
J. Lilliane
Free Printable Tarot Decks — 20 Pages of Cards to color
I created these black and white line art versions of two classic tarot decks so you could print them at home and color each card exactly the way you want. They are formatted to print 6 cards to a page on standard letter (8.5 x 11”) sheets with an inkjet or laser printer — there are thirteen sheets of cards (for a total of 78 finished cards!) for you to color so hopefully you can ward away boredom for just a bit longer.
Tarot Reading Resources
I’ll be adding more links to this section as I find them, please reach out to me if you have any free tarot resources you’d like to see on this page.
Spreads
Coming soon…
Card Associations Cheat Sheet — explains the meaning and/or associated keywords of every card and suite of the tarot.
More interesting facts about western occultism and tarot.
Photos of colored in cards — please feel free to reach out to me via my contact form, or through Instagram DM’s or by using the hashtag #jayscolortarot
About these Tarot Decks
I chose to offer these two decks because as far as Tarot goes, the Rider-Waite deck is what you might call the classic, quintessential Tarot deck of the 20th century. The B.O.T.A. Tarot was created only a few years later and is heavily influenced by the imagery of the RW deck (sometimes deemed a “clone” deck), but does have a few key differences. Another reason why I wanted to include the B.O.T.A. deck is that it’s creator, Paul Foster Case, had a deeply held belief that each student should color their own deck — a sentiment that aligns rather well with the aims of this project.
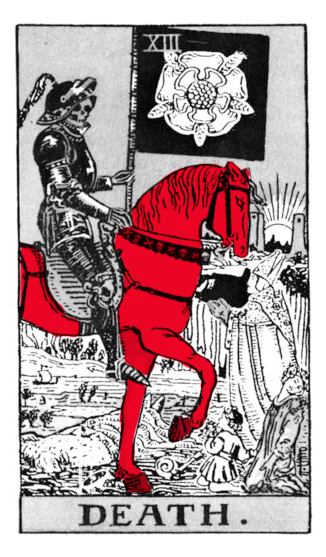
Rider-Waite Tarot
Click the button below to download all 78 cards of the classic Rider Waite tarot deck.
This PDF file is 13 pages long, with 6 cards per page (formatted for standard letter sheets, 8.5” x 11”) and prints in black and white so you can easily color it in.
Rider-Waite Deck
Created by Arthur Edward Waite and illustrator Pamela Colman Smith in 1910, the Rider-Waite deck was one of the first to have full illustrations for all 78 cards (both major and minor arcana), and certainly set the stage for exploration of esoteric and occult practices in the West. Prior to the Rider Waite deck, there were no other fully illustrated tarot decks aside from the Sola Busca tarot which was created in northern Italy in 1491 -- which heavily influenced Waite's deck.
Update 2/2021
I replaced the old PDF with a fresh new one featuring higher quality images so your cards will print more clearly. No cards missing this time either. Please get in contact with me if you find any errors in this version.
B.O.T.A. Deck
Builders of the Adytum is quite a mouthful which is why this deck is usually referred to as B.O.T.A. — but who and what are the Builders of the Adytum, and how do they relate to this deck?
Let me fill you in. So Paul Foster Case along with artist Jessie Burns Parke created this deck in the early 1900’s. Case changed what he believed were mistakes made by Rider-Waite, something he called “blinds”. Case was an American occultist, author, and scholar interested in tarot and Qabalah. He had a lifelong fascination with the occult — as a child he often experienced lucid dreams, which stoked his interest in the unknown even further.
When Case was 16 years old, he met Claude Fayette Bragdon, a well respected architect and occultist from Rochester, New York. Bragdon asked Case what he thought the origin of playing cards might be. Case was intrigued and sought an answer in his father’s library, where he discovered an inexplicable link to Tarot.
Some time later, around 1925, Case moved to Los Angeles, CA and established the Builders of the Adytum school which still exists today. Over the next thirty years, Case designed the curriculum and lessons that are part of what is known as the Western Mystery Tradition consisting of occult tarot, Qabalah, and hermetic alchemy.
Case’s take on tarot was that it was a tool for meditation, redefining the word “divination” to mean “the use of spiritual intuition to find solutions to problems”. In his book, 'The Tarot, A Key to the Wisdom of the Ages' he details the specific differences between ‘divination’ and ‘fortune telling’ and leaves the reader with this warning:
"Finally, let me reiterate the thought that this is not to be used for vulgar fortune telling, or to amuse a party of friends. If you yield to the temptation so to abuse this information, you will pay for it in the loss of all power of true divination, and probably in the loss of ability to control the higher rates of psychic vibration."
There's so much more to read, so if you'd like to delve deeper into any of the subjects I've mentioned, you can find more details by following the links above and below.
The Builders of Adytum (wiki) | BOTA's Website
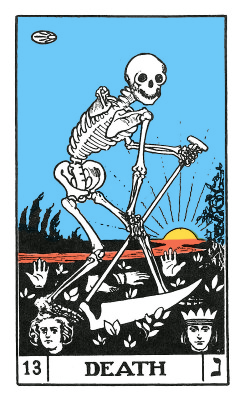
B.O.T.A Tarot
Click the button below to download all 78 cards of the Builders of the Adytum (B.O.T.A) tarot deck.
This PDF file is 13 pages long, with 6 cards per page (formatted for standard letter sheets, 8.5” x 11”) and prints in black and white so you can easily color it in.
Printing Notes and Suggestions
For best results, choose the paper you print these on to match whatever medium you plan to use to color them in — for example:
Watercolors: Print on Watercolor Paper or Bristol
Markers: Choose a paper thick enough to prevent bleeding (Illustration Board, Bristol)
Colored Pencil: Print on thick Cardstock, Bristol, or Illustration Board
Note: These cards do not have any design for the reverse side. You can opt to create your own in several different ways:
Double-Sided Printing: Not all home printers offer double sided printing, but all printers can do it with some cleverness on your part. Once you have printed all 13 pages, and chosen an image to be used on the back of the card (try to pick a pattern, flat color, or colored gradient), load your thirteen pre-printed pages back into the printer with the unprinted side facing up (most printers will have a diagram showing which side of the paper will be printed when you load sheets into it’s feeder, make sure to consult the diagram or manual so you can ensure your pages are loaded such that the blank side will be printed on). Now apply your pattern, color or gradient to the whole sheet and print borderless if your printer allows it.
Manually: You can also draw, paint or stencil your own design onto the back of the sheets. It’s best to do this before cutting the cards out of the sheet.
Cutting Corners
One last boring technical note from me. For projects like this, its best to use either a paper cutter with a large blade arm (like they have at school or at the copy shop) or an Exacto/Utility Blade/Boxcutter and a metal straight edge to ensure your cards turn out uniform and straight. Once you’ve completed that, you may be content with how your cards look — or you may not be. Typically, playing cards and tarot have rounded corners, but don’t fret over the thought of doing it with scissors or something horribly tedious like that. With the money you saved from not having to buy this deck, purchase a type of paper punch called a “corner rounder”. Some can accommodate different sizes of corners, which will give you a tighter/smaller curve or a wider one.
If you have really enjoyed this free printable project…
And want more free DIY content accompanied by very long winded explanations from yours truly, please consider donating the coins you collected from your car cupholder or dug out from the recesses of your couch. It doesn’t have to be a lot and I’ll understand if you just can’t swing it right now, but your support means the world to me and every red cent goes right back into projects and art we can all enjoy.
If you’d like to offer these files on your site or elsewhere, or if you have any issues please reach out to me.